Wednesday, January 26, 2011

My Thrifted Office Chair

I found a great office chair at Goodwill for $15! I love it's shape and especially love it's chrome legs. It's also pretty comfortable. All it needs is new fabric.


Here's what I'm thinking will look great on it: 


It's Dwell Studio's Gate Charcoal and below, Gate Brindle. I can't decide on which one. So, I'll probably get samples first before committing. 


I'll be referencing Centsational Girl's great tutorial on recovering an office chair. 

Another to be continued...

:0)


Tuesday, January 25, 2011

REALLY Pink Butterfly Bedroom

My youngest daughter, who is 5, REALLY loves the color pink. Big surprise, I know. So when I was picking out paint colors for her room, I THOUGHT I found the best shade of pink. A warm peachy pink. I was even doing what you're supposed to do when picking a paint color, I chose a coordinating shade from her bedding. But, I went a shade darker to create a little more impact. Well, it definitely created some impact. But more like a slap in the face with a bright flashlight right in the eyes.

Here's what I mean:


Yooouuuch! That's bright! 

 But, even with the flamingo pink walls, I am happy with the look of everything. I was inspired by Pottery Barn Kid's Lindsey Collection. I LOVE it. But, what I loved more was saving some serious dough by getting a little creative.


Since my daughter is Disney Princess OBSESSED. Another shocker, huh? I whipped up some art using my own two hands and some cheap map pencils. I found these beautiful Disney scrap booking stickers and incorporated them into the drawing for a neat dimensional look.


 These two photos are pre-tent canopy. I found an affordable alternative at Ikea for $20! If you compare that to the cost of Pottery Barn Kids, that's an $80 savings!


I made these butterflies out of scrap booking paper and taped them right on the wall. You can check out my other post on paper butterflies here.


My other drawings turned out so well, I decided to make an Alice In Wonderland themed picture too. I drew the background and this time I used Disney and daisy stickers along with a little sheet moss for the tree's foliage. One of my favorite scenes in the original movie is when Alice is singing and laying in the daisies.


I found the dresser on Craigslist and gave it a coat of white. You'll notice that the paint has chipped away from the 2 bottom drawers. But I kind of like the worn away look of it. Plus, the drawers do not open smoothly so I don't really have a choice!


I made my own version of the Rose Lamp from PB kids and saved even more. I found the lamp at Big Lots for a mere $15. I bought all the roses at Hobby Lobby for 50 cents a piece and hot glued them onto the lampshade. I figure I saved about $60 doing it myself. 

Some things I'd like to change: 
New paint color. I'm thinking Benjamin Moore Lavender Ice
New bedding in crisp white with some new patterned decorative pillows. 
New curtains: crisp white

Hopefully sometime, by the end of Spring, I will have updated pictures to show you. Until then, to be continued...
 :0)

Wednesday, January 19, 2011

Magazine and Catalog Storage

I have a growing collection of catalogs and decorating magazines. I haven't bought ONE thing out of them. I use them strictly for inspiration. Because I know I can either make it myself or find a similar/copy cat item or style cheaper some where else. I found a great basket at Good 'Ole Will for a couple bucks, maybe even less, can't remember. So I came up with a cute way to display my catalogs:


Now, I know you're probably thinking, "If you ever want to look at them, they will be curly and the pages will be hard to turn". 


Well, these have been rolled up in this basket for a few days now, and they really don't curl as much as you think. Besides, it doesn't bother me and it looks cute. :0)

Friday, January 14, 2011

Wall Clock Before and After...

I thought I would share a quick before and after of a wall clock I had. A little ivory spray paint and some brushed on silver craft paint, turned it into something more modern cottagey chic. :0)


Here's the before: 


Tuesday, January 11, 2011

My Home Office Redo

Well, the day finally came when our cheap metal and wood laminate desk died.....and it's definitely the only time I've ever been happy about something dying! It gave me the opportunity to convince my hubby that we needed to finally get around to actually decorating our home office. A trip to ikea, goodwill and some homemade stenciling, made it into this:


I searched and searched my picture files for a before shot and apparently the room was so blah before that no one hardly ever took any pictures in there! Here's the only two I could find:

Before:


Here are some of my daughter's friends. It doesn't even look like an intentional shot!


I took this phot after completing the trellis wall. The desk on the left is the one that died. It was literally being propped up so that the legs would not collapse. Eww, look at all those yucky cords!

Basically the room was unfinished looking with unframed art and two mismatched desks with exposed wires underneath slapped side by side against the wall. Yeah, I know.

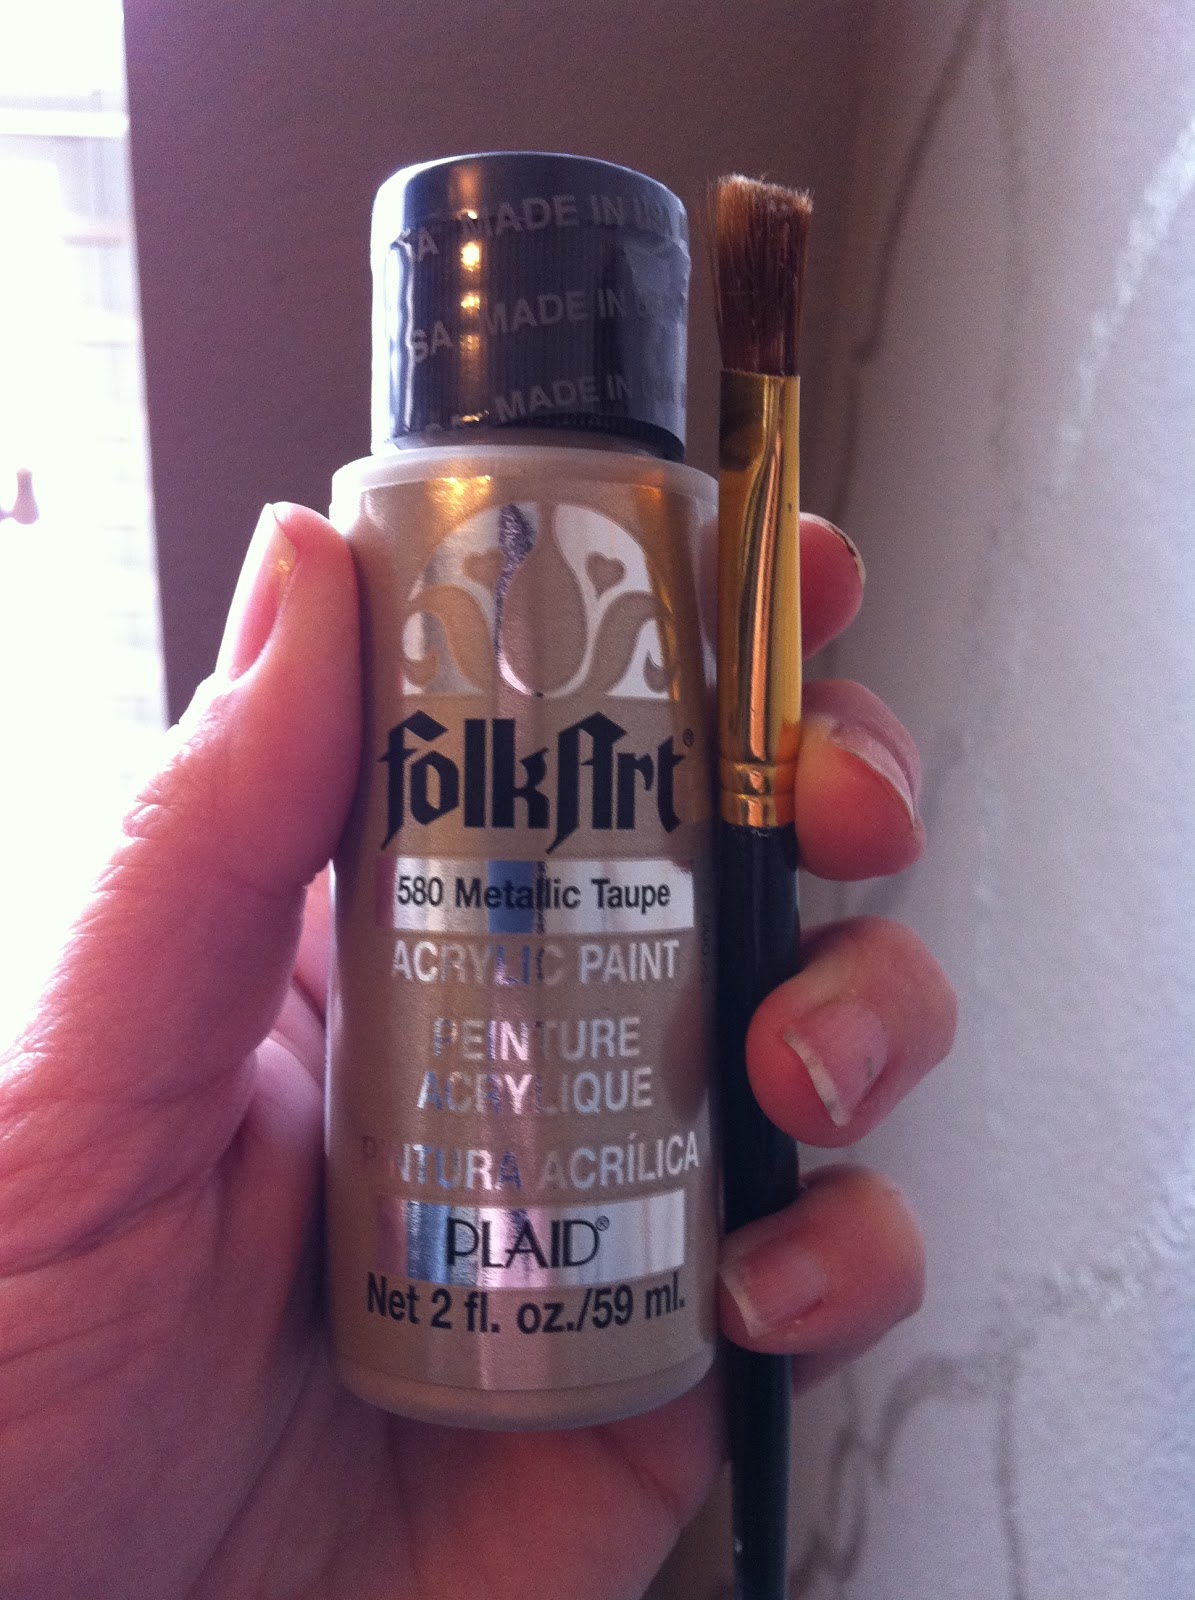
The first thing I tackled in the room was the walls. After seeing the beautiful and classy trellis wall that centsational girl painted in her master bedroom, I knew I had to try that. And so I did. :0)

I mostly followed her instructions. But, found it easier to skip the tracing step and just start painting directly on the wall. I started on the left side, working my way down until starting a new row.


I just love how the light reflects on it. 


After getting a heads up from Emily A. Clark on the great deal she got on these wedding signature frames at Ross, I was lucky enough to find them too at $8 each! I framed some of my sketches from a drawing class I took. 


I found these planters at Hobby Lobby for $3.50 each. The floral picture I found at Goodwill for $1.55!!
I already had the candelabra purchased at Pier One a few years ago and spray painted it silver. The lady statue was a gift from a friend who went to Spain. 


Instead of using a regular old mouse pad, I went with books. Dilbert fits right in with this office space. :0P


Chess pieces are from Hobby Lobby at a few dollars each. Boxes are from ikea. 


Gold vase was on clearance for $10 at Target, two ikea ribba white frames, "OH" letters were 50 cents at Goodwill. 


This monitor was shorter than the other. So, to give it some height, I used a shoe box I covered in wrapping paper. 


My old Target end table, painted white, is just right for the printer. 


Pretty paper wreath I made looks nice above the back door. 


Since this is such a small room, the expedit desk from ikea provided the right amount of space and just enough area for two people to work comfortably. 


And to break up the giant size of the fireplace, I used my Target coffee table, painted white, as a bench. Later on, I'd like to make a bench cushion for it. 

So there you have it. From a dead dud of a desk to a stylish and functional workspace. For very little $. 

Wednesday, January 5, 2011

Chalkboard Paint on Planters

Hope you are having a great start to 2011! I've already set a ton of goals for myself. One of which includes blogging more often! I have to admit. This is harder than I thought. Words don't always come easily to me and I don't always have a decorating or crafting project to report on. So, I guess this means I need to line up some more projects so that I can at least blog on a weekly basis.

Speaking of projects, here's one I just got done with:

My stairway has 3 tiered shelves that have been longing to be filled with something decorative. I wanted to put planters on them but could never find any I liked for the price. Finally, that day came! I found 3 planters while browsing in Ross for $10 each. Two of them were greenish colored and the other one was a creamy color. I loved the shape but not the colors.

Here's what they looked like:


I wanted to paint them black and decided to try chalkboard paint ($4). 


I gave them all a light coat using a foam brush. Then I wrote my kid's first initial on each of them to be cute.

Here's how they turned out:


I'm still undecided on whether I should replace them with real ferns or not. :0)