Showing posts with label black and white. Show all posts

Tuesday, October 18, 2011

Some Halloween Decorating

Long time, no post! I don't really have an excuse either. I guess, I just haven't been very motivated lately to write and upload photos. Still haven't completed the kitchen...:0/ Hopefully I'll get around to it in the next few months. 


But, I have been decorating for Halloween! Every year, my Mom and I host a Halloween party at my house. I think it's our favorite holiday besides Christmas. Shocker, huh? I think that's probably true for most people. LOL 


With some spooky special effects via Instagram, here's what I've done so far:


I made these candles look bloody by simply dripping red wax down them. 


The white treat bag was made using Martha Stewart's skull potato stamp tutorial. 


Wednesday, June 29, 2011

Kitchen: Phase 2-ish

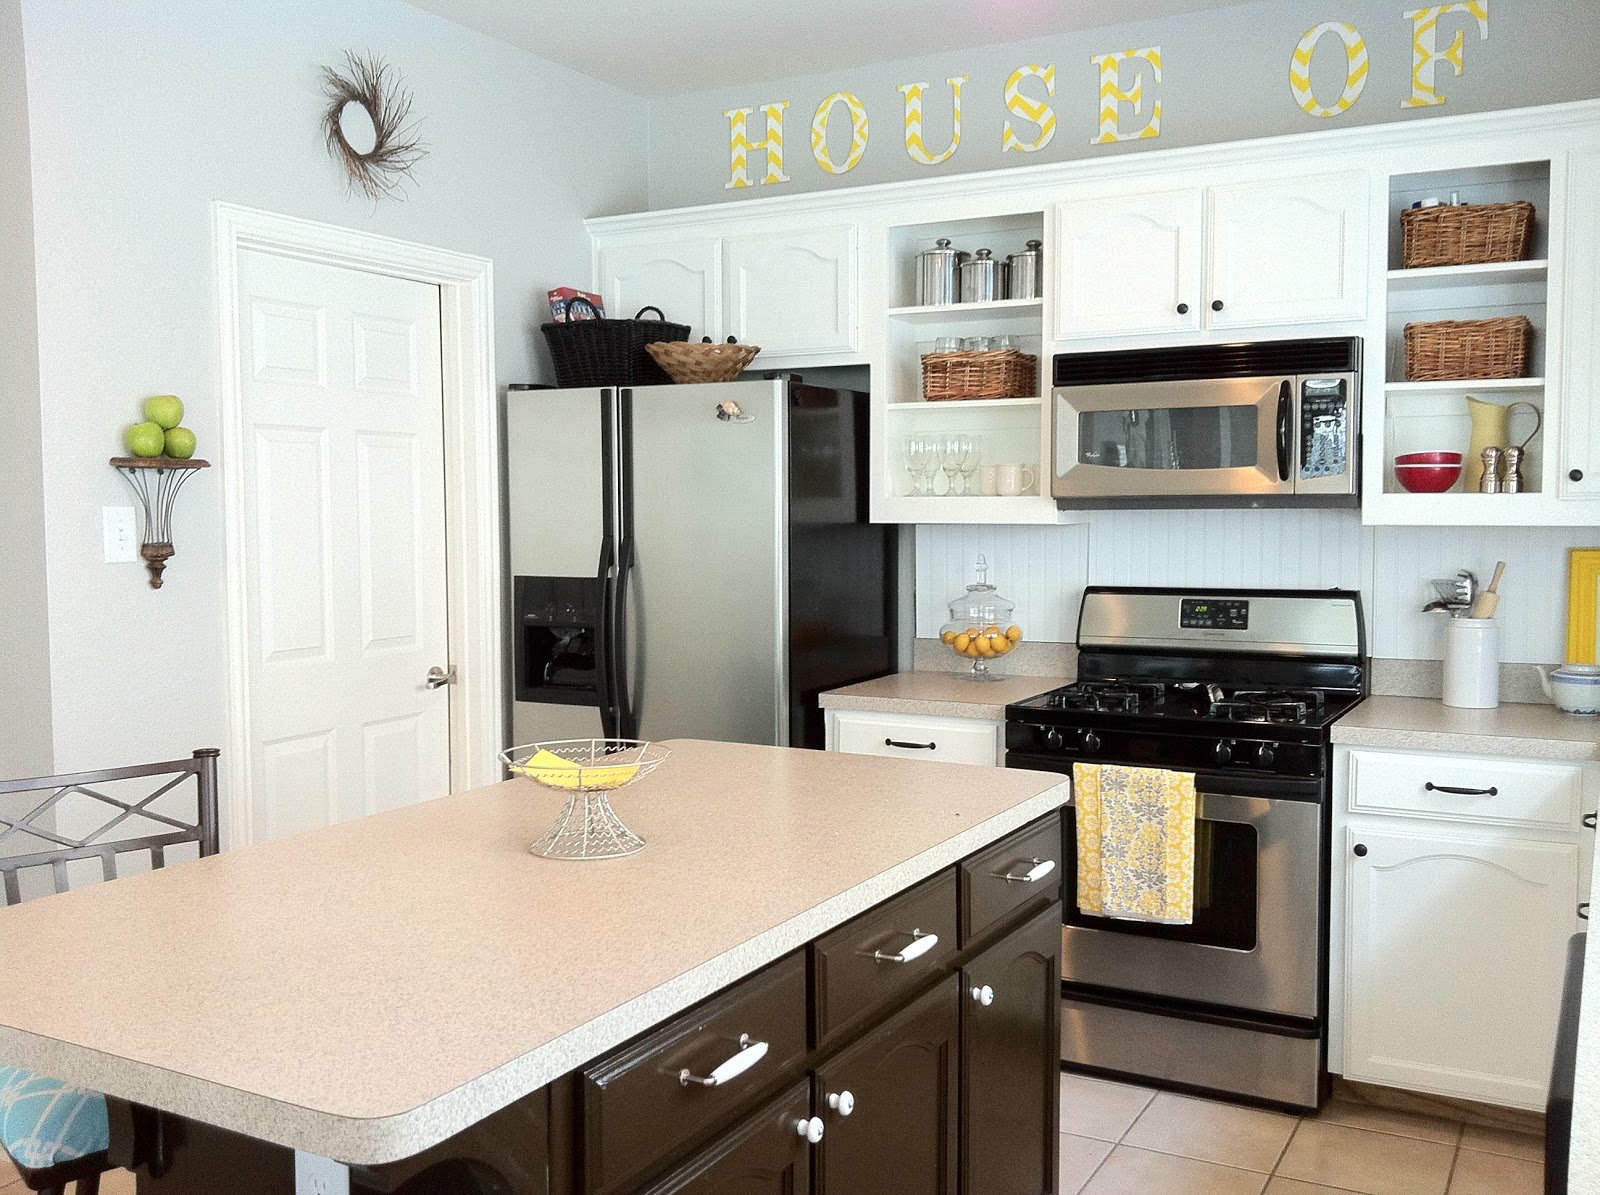
Hey there! Thought I would share some progress photos of the kitchen during Phase 2....ish. I say "ish" because the bead board back-splash isn't attached and properly trimmed. But, I've been painting the corbels that will go under the cabinets once that is in place.

I've also been working on a cute decorative wall accent for above the cabinets. I loved the wooden letter words that Ashley from TheHandMadeHome cut out and covered with some lovely yellow patterned fabric. I found some wood letters at Hobby Lobby and painted them in a chevron pattern and another pattern. I love how it turned out!


I recovered my bar stools and made some curtains using a table cloth on clearance at Target. I paid $7!


I also found these kitchen towels at Target on clearance for $10 or $11. A nice compliment to the grey and yellow scheme.  


Almost forgot to mention installing kitchen knobs and pulls on the cabinets! I got mine at Ikea. I went with Svep in black for the white cabinets and Lindsdal for the island.
Can't wait to get the bead board and corbels in place! 


Tuesday, April 19, 2011

Master Bedroom....again.

Hey there! I added a tv armoire to my bedroom plus accessories:


I painted the armoire a beigey white, which was originally a dark stain wood look, and painted the tv tray turned-accent-table a creamy white. 


These boxes also got a fresh new look. They had wine bottles and wine glasses on them and I painted them white and used a homemade stencil in a chevron pattern. I think it really brings out the brass details. By the way, I'm loving this pattern right now (along with most of blog land)! Every time I see this pattern being used, whether it's on a pillow or a rug, I WANT it. LOL

Here's how everything looks on this side of the bedroom now:


It's coming along, one project at a time, and very little money spent. Next I'll be adding a sitting chair and accessories by the window. 

Suzy :0)


Thursday, March 3, 2011

Update on My Master Bedroom

I've been busy re-tweaking my master bedroom and adding new furniture. Plus a new mattress set that we desperately needed. Our new bed is sooo comfortable!


 I got some incredible inspiration from Emily A, Clark. She used two ikea malm dressers, in her latest client project, and added pull rings to the drawers to dress them up. Absolutely beautiful and affordable! I headed to ikea and bought two malm dressers and the eight drawer hemnes dresser for under $500. I still need to buy pull rings and this is what I'm thinking of getting:


They are very similar, and may be the exact same ones she used.  You can find these at www.bellacor.com for $4.03/each. I love the poster bed she used and it looks very similar to the one I've been admiring from Zocalo Furniture's Madison Collection. 


It retails around $900-1,000 for a King. NOT in my price range. But, I found a similar poster bed at half the cost! 


I could easily paint it black-brown to match my other furniture. This is definitely on my list of future purchases! 

The beautiful, sleek beveled mirror used above the dresser looks just like this Z Gallerie mirror. 


But, at $270, I just can't stomach paying that much for a mirror. So I'll be on the look out for something similar at half the cost. For now, I like the current mirror I'm using. It used to have a rubbed silver/black finish and I spray painted it "heirloom white" by Rustoleum. More to come...

:0) Suzy


Tuesday, January 11, 2011

My Home Office Redo

Well, the day finally came when our cheap metal and wood laminate desk died.....and it's definitely the only time I've ever been happy about something dying! It gave me the opportunity to convince my hubby that we needed to finally get around to actually decorating our home office. A trip to ikea, goodwill and some homemade stenciling, made it into this:


I searched and searched my picture files for a before shot and apparently the room was so blah before that no one hardly ever took any pictures in there! Here's the only two I could find:

Before:


Here are some of my daughter's friends. It doesn't even look like an intentional shot!


I took this phot after completing the trellis wall. The desk on the left is the one that died. It was literally being propped up so that the legs would not collapse. Eww, look at all those yucky cords!

Basically the room was unfinished looking with unframed art and two mismatched desks with exposed wires underneath slapped side by side against the wall. Yeah, I know.

The first thing I tackled in the room was the walls. After seeing the beautiful and classy trellis wall that centsational girl painted in her master bedroom, I knew I had to try that. And so I did. :0)

I mostly followed her instructions. But, found it easier to skip the tracing step and just start painting directly on the wall. I started on the left side, working my way down until starting a new row.


I just love how the light reflects on it. 


After getting a heads up from Emily A. Clark on the great deal she got on these wedding signature frames at Ross, I was lucky enough to find them too at $8 each! I framed some of my sketches from a drawing class I took. 


I found these planters at Hobby Lobby for $3.50 each. The floral picture I found at Goodwill for $1.55!!
I already had the candelabra purchased at Pier One a few years ago and spray painted it silver. The lady statue was a gift from a friend who went to Spain. 


Instead of using a regular old mouse pad, I went with books. Dilbert fits right in with this office space. :0P


Chess pieces are from Hobby Lobby at a few dollars each. Boxes are from ikea. 


Gold vase was on clearance for $10 at Target, two ikea ribba white frames, "OH" letters were 50 cents at Goodwill. 


This monitor was shorter than the other. So, to give it some height, I used a shoe box I covered in wrapping paper. 


My old Target end table, painted white, is just right for the printer. 


Pretty paper wreath I made looks nice above the back door. 


Since this is such a small room, the expedit desk from ikea provided the right amount of space and just enough area for two people to work comfortably. 


And to break up the giant size of the fireplace, I used my Target coffee table, painted white, as a bench. Later on, I'd like to make a bench cushion for it. 

So there you have it. From a dead dud of a desk to a stylish and functional workspace. For very little $. 

Monday, November 29, 2010

Handmade Peace Ornaments for Christmas

I whipped up some very cute and easy to make peace sign and dove ornaments for my tree this year. 


They were made using images I found online. All you need is some card stock paper, white glitter, spray adhesive, acrylic gems and ribbon. 

Here's how I did it: 


I folded a piece of card stock in half.


Then, using the printed image I found online, I made a stencil that I could trace onto the folded card stock. 


After cutting it out, you will have two doves. 


Using spray adhesive, glue the two doves together. This will help make it more sturdy so that you can use them again next year!


Next, make a hole for hanging your ornament. I used a hole puncher. Then, spray adhesive on one side and sprinkle the glitter evenly. When it is dry, flip it over and do the other side. 


Hang it on the tree with some ribbon and enjoy the sparkle! 


The peace sign ornaments were made using the above steps. But, instead of sprinkling glitter on them, I glued acrylic gems with spray adhesive. 

They made my tree look extra nice and they were fun to make! Enjoy! :0)